
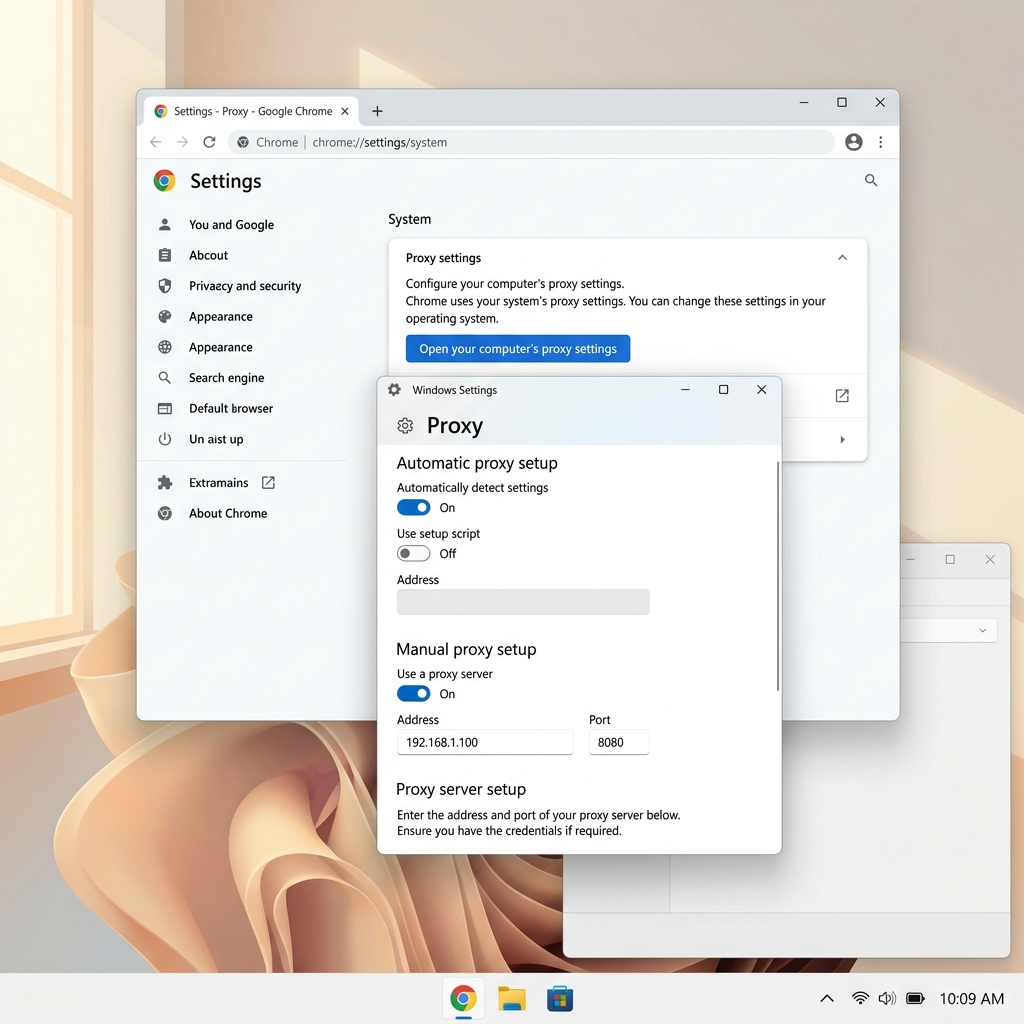
1. Google Chrome & Network Proxies
Google Chrome is the most widely used web browser globally, built on the open-source Chromium project. When you want to route Chrome's traffic through an anonymous proxy server, it is important to know that Chrome utilizes your **operating system's global network proxy configuration** by default.
This means that configuring proxy parameters directly inside Chrome requires modifying your Windows System Settings or macOS System Settings. Any proxy configured this way routes all network traffic on your computer (including other browsers and update services) through the proxy connection.
Alternatively, if you only want to route Google Chrome's queries through the proxy, you can launch Chrome via custom command-line flags or utilize a third-party browser extension (such as SwitchyOmega or FoxyProxy).
2. Setting Up Proxies on Windows (for Chrome)
Follow these steps to route Windows Chrome traffic through a Turbo Proxy gateway:
Step 1: Access System Proxy Settings
Press the Windows Key, type "Proxy settings", and press Enter. This launches the Windows Network & Internet Proxy settings window.
Step 2: Edit Manual Proxy Setup
Scroll down to the **Manual proxy setup** section. Turn the toggle switch next to "Use a proxy server" to On.
Step 3: Enter Host and Port
Input your Turbo Proxy host and port credentials:
- Address:
gate.turboproxy.online - Port: e.g.,
7000
Click Save. The next time you open Google Chrome and navigate to any page, a system credential pop-up will appear requesting your proxy username and password. Enter your Turbo Proxy dashboard credentials to establish the connection.
3. Setting Up Proxies on macOS (for Chrome)
For macOS users, configure Chrome proxies by setting network settings in System Settings:
Step 1: Open System Settings
Click the Apple logo in the top-left corner of your screen and select System Settings. Navigate to the "Network" sidebar menu.
Step 2: Select Network Interface
Select your active connection (e.g., Wi-Fi or Ethernet) and click the "Details..." button next to it. Scroll down and select "Proxies" from the pop-up menu.
Step 3: Configure Proxy Protocols
Turn on either the Web Proxy (HTTP) or Secure Web Proxy (HTTPS) toggle switches. Enter gate.turboproxy.online in the server text field and your assigned port in the port text field. Toggle on "Proxy server requires password" and input your proxy username and password credentials. Click OK and apply the changes.
4. Launching Chrome with Command Line Flags
If you do not want to change your global system settings, you can launch a single Google Chrome browser instance fully isolated and routed through a proxy using terminal flags.
For Windows Users:
Open Command Prompt and launch Chrome as follows:
"C:\Program Files\Google\Chrome\Application\chrome.exe" --proxy-server="http://gate.turboproxy.online:7000"
For macOS Users:
Open Terminal and execute the launch command:
/Applications/Google\ Chrome.app/Contents/MacOS/Google\ Chrome --proxy-server="http://gate.turboproxy.online:7000"
Troubleshooting Common Connection Issues
1. Chrome shows "ERR_NO_SUPPORTED_PROXIES"
This usually indicates you selected an invalid protocol format in your operating system's settings. Ensure that you have cleanly typed only the host name (do not prefix it with http:// or socks:// inside the OS address field).
2. Proxy Authentication Loop
If Chrome repeatedly prompts for your username and password, double-check that your Turbo Proxy credentials match exactly. If you are using rotating residential proxies, ensure that you haven't exceeded your monthly bandwidth limit.